MicroPython is a compact, efficient, and easy-to-learn implementation of the Python programming language optimized for microcontrollers and small embedded systems. When combined with the ESP32, a versatile and powerful microcontroller, it opens up exciting possibilities for IoT (Internet of Things) and embedded projects. In this article, we’ll walk you through the process of getting started with MicroPython on the ESP32, from setting up your development environment to running your first MicroPython code.
Introduction to MicroPython and ESP32
What is MicroPython?
MicroPython is an open-source project that brings Python 3 to microcontrollers and small embedded systems. It’s designed to be lightweight and suitable for resource-constrained devices. With MicroPython, you can write Python code to control hardware, interact with sensors, and build IoT applications.
Meet the ESP32
The ESP32 is a versatile microcontroller developed by Espressif Systems. It’s known for its powerful dual-core processor, built-in Wi-Fi and Bluetooth capabilities, ample GPIO pins, and various hardware peripherals. The combination of MicroPython and ESP32 makes it a perfect platform for developing IoT and embedded projects.
Setting Up Your Development Environment
Before you can start using MicroPython with the ESP32, you need to set up your development environment. Here’s a step-by-step guide to get you started:
1. Hardware Requirements
To begin, you’ll need the following hardware:
- An ESP32 development board (such as the ESP32 DevKitC or NodeMCU-32S or M5 ATOM MATRIX (in my case))
- A USB cable for connecting the ESP32 to your computer
- A computer with a USB port
2. Installing Python
MicroPython relies on Python for various tools and scripts. Ensure that you have Python 3.x installed on your computer. You can download Python from the official website (https://www.python.org/downloads/).
3. Installing esptool
esptool is a Python-based tool that allows you to communicate with the ESP32 bootloader and flash MicroPython firmware onto the device. You can install it using pip, the Python package manager, by running the following command:
pip install esptool
4. Downloading MicroPython Firmware
Visit the MicroPython website (https://micropython.org/download/esp32/) to download the MicroPython firmware for ESP32. Choose the stable version or a development version based on your requirements.
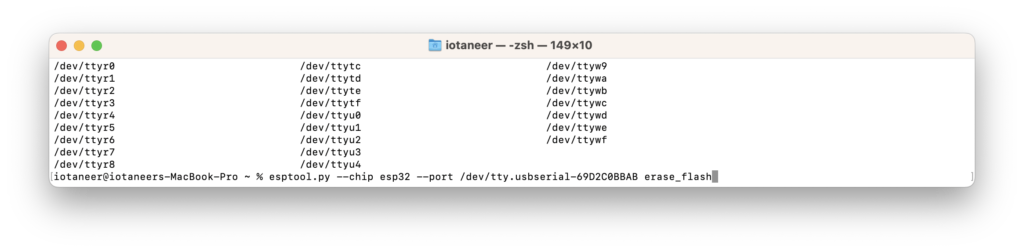
5. Flashing MicroPython Firmware
With the ESP32 connected to your computer via USB, you can use esptool to flash the MicroPython firmware. Run the following command, replacing <port> with the appropriate serial port for your ESP32:
esptool.py --port <port> --baud 150200 write_flash -z 0x1000 <firmware.bin>
Replace <firmware.bin> with the path to the MicroPython firmware you downloaded earlier.
6. Testing the Installation
After successfully flashing the firmware, you can connect to the ESP32’s MicroPython REPL (Read-Eval-Print Loop) using a serial terminal program such as PuTTY (on Windows) or Minicom (on Linux). Configure the terminal to use the same serial port and baud rate (115200) as your ESP32.
Once connected, you should see the MicroPython prompt (>>>), indicating that you are ready to start writing and executing MicroPython code on your ESP32.
screen /dev/tty.usbserial-69D2C0BBAB 115200
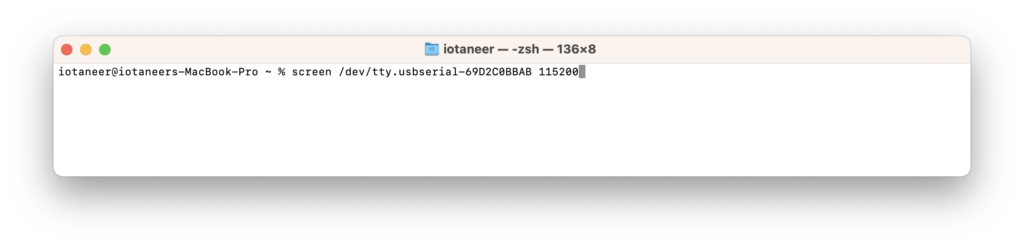

To exit screen, press Ctrl-A followed by Ctrl-\.
Your First MicroPython Program
Now that you have MicroPython up and running on your ESP32, let’s create a simple “Hello, ESP32!” program to verify that everything is working as expected.
Writing MicroPython Code
Using your favorite text editor, create a new Python script (e.g., main.py) with the following content:
print("Hello, ESP32!")
Save the file to your computer.
Uploading the Code
To upload the code to your ESP32, you can use a tool like ampy, which allows you to transfer files to the ESP32’s filesystem. Install ampy using pip:
pip install adafruit-ampy
Once installed, you can upload your main.py script to the ESP32:
ampy --port <port> put main.py
Replace <port> with the appropriate serial port for your ESP32.
Running the Program
After uploading the code, reset your ESP32. You should see the “Hello, ESP32!” message printed in the MicroPython REPL.
Congratulations! You’ve successfully set up MicroPython on your ESP32 and run your first MicroPython program.
Conclusion
MicroPython on the ESP32 is a powerful combination that makes it easy for both beginners and experienced developers to create IoT and embedded projects with the simplicity and versatility of the Python language. In this article, we covered the basics of setting up your development environment, writing your first MicroPython program, and offered ideas for further exploration. Now, it’s time to dive in, experiment, and bring your creative ideas to life with MicroPython and the ESP32.
Happy coding!